Fun with ESP32
Posted on 2021-January-27 in programming

Espressif is this little fabless Chinese company who are behind the incredibly successful ESP8266 chip, followed in 2016 by a more powerful successor: the ESP32. This microcontroller allegedly uses a lot more power than equivalent Arm MCUs (though I haven't done any research on that topic), but what really makes a difference with similar Arm-based microcontrollers is the price point. Boards based on the older ESP8266 chip can be bought for a bit less than 2€ (+shipping) from AliExpress if you can stomach the wait (1-2 months) or for hardly more from Amazon if you commit to a 5-pack, with next-day or even same-day delivery.
ESP32 refers to the microcontroller chip that can be found on a whole variety of products. Some creative Chinese companies have built countless variations around that theme, which can make it a bit difficult to choose the right board if you don't know what to look for.
Some Specs
The chip (officially called Xtensa) is actually a 32-bit dual-core running at 240MHz, which is thirty times faster than my first IBM-compatible. It has 540kB of embedded RAM and comes with no internal flash. No need to worry about flash storage though: all the boards you can find add their own on-board flash ranging from 4MB (standard) to 16MB (rare).
Some boards also add external RAM connected through an SPI bus: most often a 4MB chip, sometimes up to 8MB, referred to as SPIRAM. Careful though: the processor can only work with 4MB chunks at a time and you will need to care about bank switching if you want to use the upper 4MB of an 8MB RAM chip.
You can have up to 44 programmable GPIOs, though most often some are reserved for those extra flash, RAM chips, user LEDs, or even a micro-SD card interface. Some GPIOs are reserved for analog signals, most are meant for digital usage. Some pins are input-only. Good thing is: GPIOs are not dedicated to a single usage like a lot of Arm microcontroller boards, so you can decide to put your I2C or UART on any pin you like, even assigning them dynamically at run-time.
In addition to the dual-core, the MPU also has a low-energy mode described as ULP (Ultra-Low Power), which takes over most of the time when the processor is not doing anything interesting. This manages to keep power usage low, making ESP32 good candidates for battery-powered projects. The ULP quickly wakes up from deep sleep upon interruptions so you are guaranteed to never miss a beat from a sensor. This may explain why those chips are so popular for real-time systems.
Full specs can be found on http://esp32.net/
Things you need to know
Most ESP32 boards come with an integrated micro-USB or USB type C connector that can be used for both power and serial console. If you connect it to a Linux PC you can immediately talk over the wire using tools like screen, minicom, or picocom, e.g.
picocom -b 115200 /dev/ttyUSB0
Putty is recommended on Windows, screen picocom and minicom also work on Mac.
Some boards don't have any USB connector. You can find really cheap USB-to-serial adapters on Amazon for a couple more quids, which you have to connect using wires to the right pins.
Boards
Wemos D1 Mini
Starting from the cheapest available board: the Wemos D1 Mini.
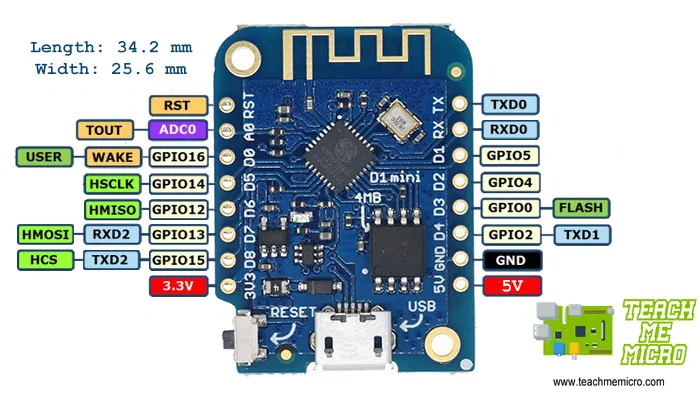
This one is really cheap, I got a couple from an electronics store in Paris for 2€/piece. They don't provide so many GPIOs so they are better suited for projects that embed a couple of sensors. The DHT11 and DHT22 are cheap (2 to 4€) popular sensors for temperature and humidity, though I would recommend the DHT22 which has sub-degree precision where the DHT11 only delivers integer values.
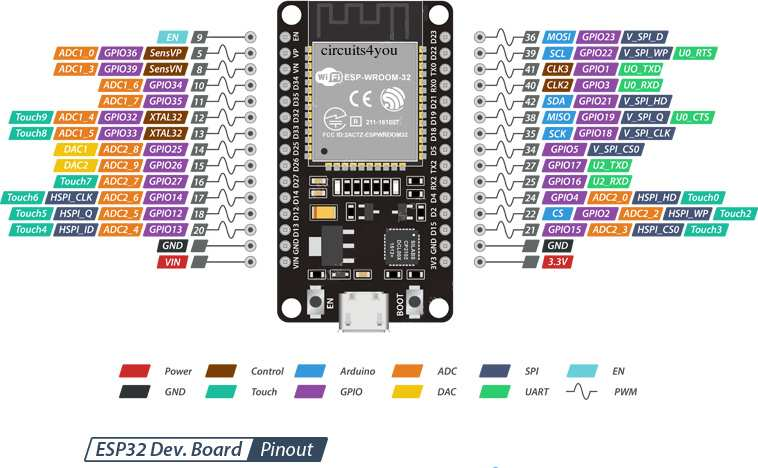
ESP32 WROOM32
For a handful more cents you can get what is probably the most popular ESP32 board.
It has a red programmable LED, which can be useful to signal what is going on, and more GPIOs than the D1 mini. No extra RAM but has 4MB of flash storage.
AI Thinker ESP32 Cam
For five to ten euros, this board embeds a tiny camera capable of delivering up to 1600x1200 pixels at a high frame-rate without a sweat. It embeds 8MB of RAM (so two 4 MB banks) and 4MB of flash.
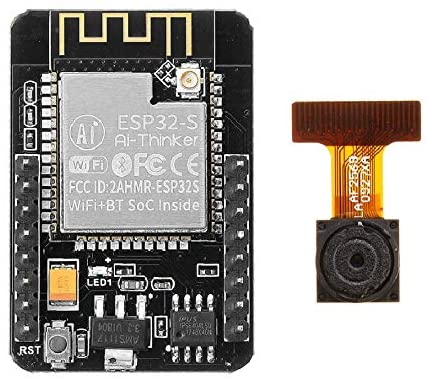
You can download and run pre-packaged firmware that allows you to put it immediately online on your home network and steer it from your web browser.
That thing also has a very bright LED that can be used as flash, but it is really bright and hurts to look at. It does not have any USB port so you need your own USB-to-serial adapter to program it, and some solution to power it up through the pins.
TTGO ESP32 T8
The default version comes with 4MB flash and 4MB RAM, a micro-USB connector and an SD card reader.
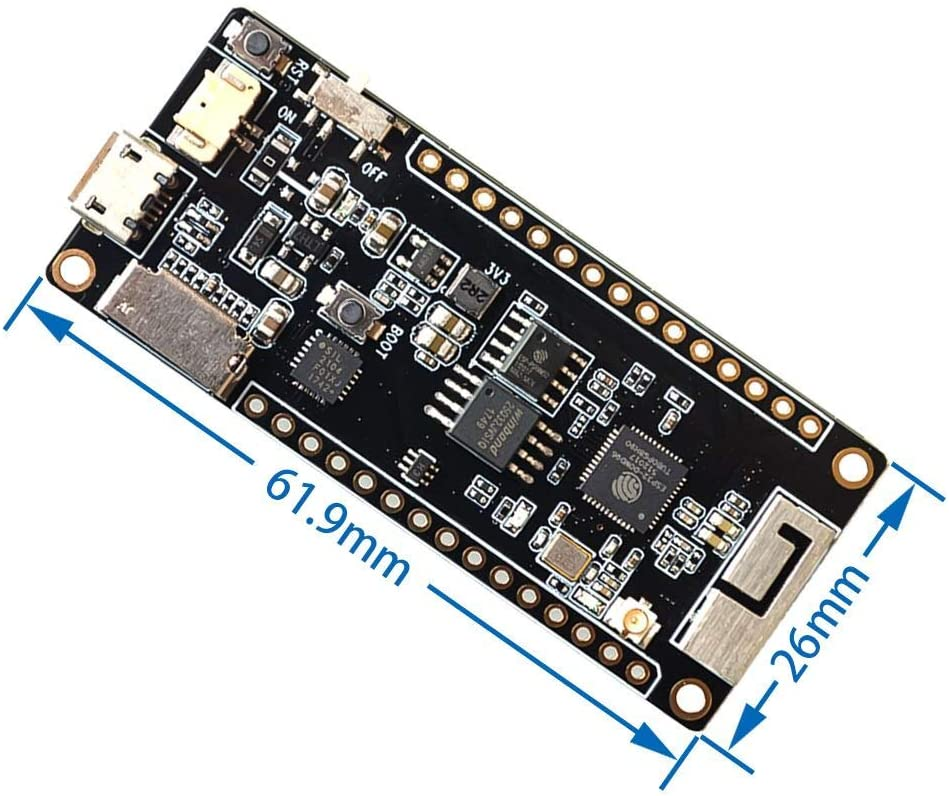
It is often sold together with a small LCD screen that makes it attractive for creating your own GameBoy emulators or equivalent. 10-20€ from Amazon, or less than 10€ from AliExpress.
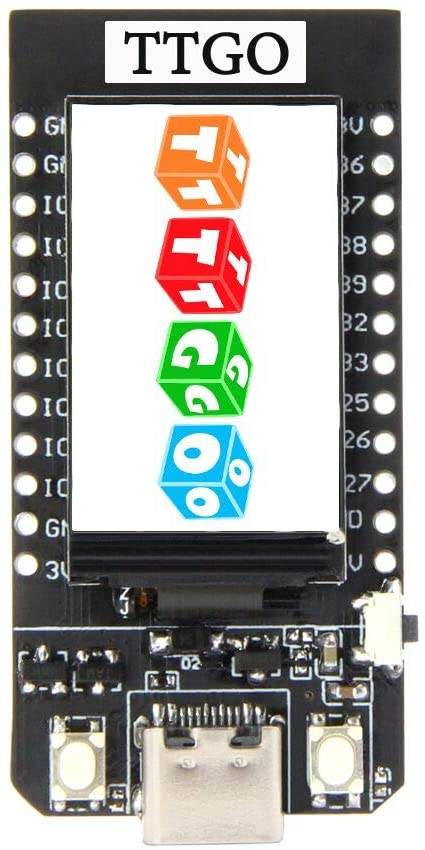
Of course the screen controls eat a few GPIOs but the screen quality is excellent and perfectly usable to display small animations or even videos.
M5Stack Family
The M5Stack family of devices offer a completely different experience: devices are built into small 5cmx5cm boxes with all GPIOs exposed on the sides. The default core piece comes with an attached LCD, a buzzer, three buttons, a USB-C connector, an SD card reader, but no extra RAM. You can add more pieces and combine (stack) them like Legos to build more complex projects.
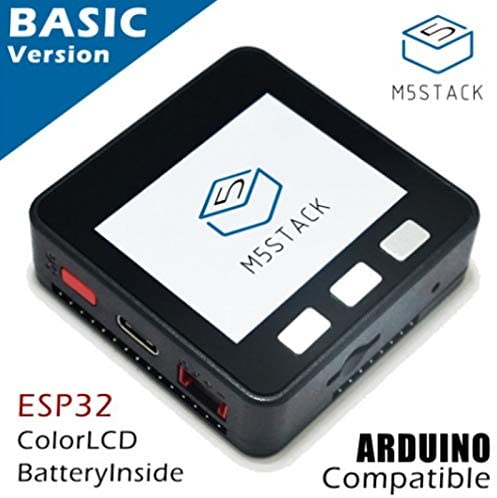
I got a couple of those basic cores, they are fun to play with but not suited for real development. If you install the Arduino IDE, they are completely supported and come with a whole lot of games and utilities like a WiFi scanner, a weather station, and other completely useless and fun programs that can be dynamically loaded from the SD card.
Tough point: their price. Count 25€/piece for basic stuff, up to 50€ for more advanced sensors like GPS or air quality sensors. For that kind of price I would get raspberry zeros and forget about the pain of programming and debugging microcontrollers.
Programming
There are many options for programming those little critters, with the most popular being:
- The Espressif ESP32 SDK
- The Arduino IDE
- MicroPython
- Microsoft Visual Studio
The Espressif ESP32 SDK: ESP-IDF
The SDK is directly available from github: https://github.com/espressif/esp-idf
You can use C or C++ and it comes with a lot of useful examples to help you get started with WiFi, BlueTooth, GPIO management and protocols of all kinds. It is supposed to work on Linux, Mac, and Windows though I only tried it on Linux.
I faced some trouble with that environment. There are currently two major versions under maintenance: V3 and V4.2. Version 3 has several notorious bugs, e.g. preventing usage of both BlueTooth and WiFi simultaneously. The same antenna is used for both, you need to multiplex access to it, sometimes with unfortunate results. I have never managed to get simultaneous BT+WiFi connections for more than 30 seconds.
Version 4.2 is far more advanced and apparently corrects a few of those issues. If you are going for a pure C-based environment, I would suggest starting from examples, copy/paste what you need until your app is complete.
Most of the trouble comes from the fact that Espressif keeps updating the SDK about twice a year without any care for backwards compatibility. If your project works with SDK version X.Y you are stuck with that SDK. If you want to upgrade to another version you will have to port your own code because they changed a whole lot of APIs. They can also be really creative with the build system: a mixture of Makefiles, CMakefiles, Kconfig, topped with Python scripts that require a zillion dependencies to run. Prepare for an install frenzy of Python packages for the first couple of hours. And of course those Python packages change (a lot) from one version of the SDK to another. Ouch.
The build system is rather brittle and will explode in your face at regular intervals, leaving you with no choice but spending a good part of your evening learning about the intricacies of CMake and Kconfig.
The SDK uses FreeRTOS under the hood, but if you stick to the documented APIs you don’t even have to care about that. I never had any trouble with FreeRTOS.
User-facing APIs are well documented and a joy to read:
https://docs.espressif.com/projects/esp-idf/en/latest/esp32/api-guides/
They have English-speaking proofreaders and it shows, as opposed to documentation found for a lot of ESP32 boards that sometimes look like hard-to-understand translations from Chinese..
The Arduino IDE
This is probably the recommended way if you want to stay close to the metal without having to deal with the tool dependency and build system nightmare. Download and install the standard Arduino IDE, add an Espressif URL somewhere in your config, click to pull out all the toolchain, and you are done. You can find examples directly from the File/Examples menu, compile them and run them on a USB-connected board.
Using the Arduino IDE produces code that takes a bit more space in RAM and flash on devices because of their fancy C++ layer. It does not hurt but I just don’t like the IDE itself or the fact that it hides a lot of bare-metal things from me. It is Ok for playing and testing ideas, doing throwaway stuff, but I would not trust it for real projects that need to be maintained over long periods of time, with version control or complex library management. On the plus side you have access to pretty much all ESP32 libraries in existence, including some NES emulators (if your board has a screen) or support for exotic sensors without having to browse a million websites before you find that obscure driver. That makes it an ideal environment for trying out new hardware, or if your projects are more about hardware than software.
MicroPython
Talking about staying away from the metal: Python is definitely a viable language on this platform with MicroPython. This version is a complete rewrite of the Python3 interpreter for microcontrollers. It also comes with batteries included (tons of fancy packages) but also has some of its own quirks.
You can theoretically use MicroPython on a dead-simple ESP32 with no extra RAM, but the interpreter + FreeRTOS + libraries only leave you less than 100kB of RAM to play with, which is excessively small. I tried to use it on a core M5Stack to display images on the LCD screen, only to find out that a lot of JPG images do not have enough space to decompress in RAM. You can work around that by striping the decoding but it requires diving deep into the JPEG library, which happens below the Python layer. Back to C!
On TTGO devices you have more RAM (4MB) and it becomes completely viable and usable. Once you flash the device with MicroPython, you can upload your Python source files using a simple command-line tool (ampy) or even read them directly from an SD card if present. Put your code in main.py and your app will automatically start after boot.
I found two version of MicroPython to play with: LoBoris MicroPython and mainline MicroPython.
LoBoris MicroPython binaries can be downloaded for ESP32:
https://github.com/loboris/MicroPython_ESP32_psRAM_LoBo
It works fine everywhere I tried it, but the project seems unmaintained today and uses an old version of MicroPython. I could not manage to compile it from scratch, which is a non-starter since I would like to add my own C-based modules. There might be a way but I found mainline MicroPython easier to tinker with.
The official MicroPython works on all kinds of microcontrollers:
MicroPython makes it ridiculously simple to program sensors. Here is an example for a DHT11 temperature and humidity sensor connected to GPIO 2:
import dht
while True:
    sensor = dht.DHT11(Pin(2))
    sensor.measure()
    print('Temperature = %d' % sensor.temperature())
    print('Humidity = %d' % sensor.humidity())
    time.sleep(3)
That’s it. No main(), no build system, no initialization, and you can dynamically change the PIN you attached the sensor to. Since Python is a high-level language you can do a lot in very few lines of code so RAM usage for your code itself should not be an issue.
If you still need to stay close to the metal for any reason, you can also build your own C modules and make them callable from Python. There is a lot of boilerplate involved but you can find good online tutorials about how to do this.
Microsoft Visual Studio
I had never used that IDE before but it seems to work fine. I installed it under Linux in a matter of minutes and then got completely overwhelmed by the huge number of menus, options, and blinking lights. I tried to follow a tutorial to set up the ESP32 environment but miserably failed, could not manage to compile anything, and gave up after a couple of hours. Probably worth another try cause everybody else says it is great.
PlatformIO offers additional tools for doing embedded software with Visual Studio. Same result: the number of options, menu, and popups made it too overwhelming for me to achieve anything. After an hour of looking through tutorials and examples I still had not managed to compile anything. Those fancy IDEs are just not my thing I suppose.
Honorable Mentions
Lua-RTOS
Honorable mention for this other project based on the Lua language: Lua-RTOS
Lua is a tiny programming language meant to be easily learned and embedded into other programs. The interpreter compiles to a 100-200KB binary on Linux, less if you remove some unneeded libraries. Going through the tutorial makes you a Lua professional in a couple of evenings. The language is about as high-level as Python with less bells and whistles, and gets the job done. Lua itself is written in C and integrates very easily with C libraries without too much boilerplate. Lua is based on a virtual machine that is a joy to look at. The code is clean, small, and very understandable.
I wish I could use Lua-RTOS out of the box but unfortunately I could not get the pre-compiled binary they provide to support an SD card reader on a TTGO ESP32. You need to recompile it from scratch based on a particular tag of the Espressif V3 SDK, which brings you back to fun with the Espressif SDK V3 build system. I did not manage to compile a working version with SD card support because I could not find the right options to remove unwanted packages to save some space, and the resulting binary did not fit. In the end I took the hard way and integrated a straight Lua interpreter directly into the system/console example provided with the Espressif SDK, and managed to get a Lua prompt working over serial. It took me a whole evening to do that and the result was not too impressive. If I wanted to add support for easy WiFi connections, network information, or GPIO support, it would probably take a lot more time. Maybe another project one day.
Tasmota32
Tasmota is an embedded OS initially written for ESP8266. More recently, the OS was ported to ESP32 as Tasmota32. It is designed to be a firmware alternative for pre-packaged connected objects such as connected lamps and power plugs. You can also run it directly on any ESP32 board for great results.
Tasmota is meant to operate completely over the air: when you first boot the device it broadcasts its own WiFi SSID without password. Connect a phone to that network and access a configuration page where you can fill in the details for your home WiFi, then reboot the device and that’s it. Your device can now be controlled from an embedded tiny web server that allows you to switch it on and off. It has native MQTT integration so you can also control it from things like HomeAssistant on your home network, or even Alexa or Google Agent if that’s what you want.
I tried Tasmota32 with an ESP32-Camera and it works remarkably well. Device settings can be controlled directly from a browser, and images (or streams) can be captured by simply getting a fixed URL, making it trivial to integrate with home automation systems.
ESP32 Madness
Enthusiasts have taken the ESP32 to unmatched levels.
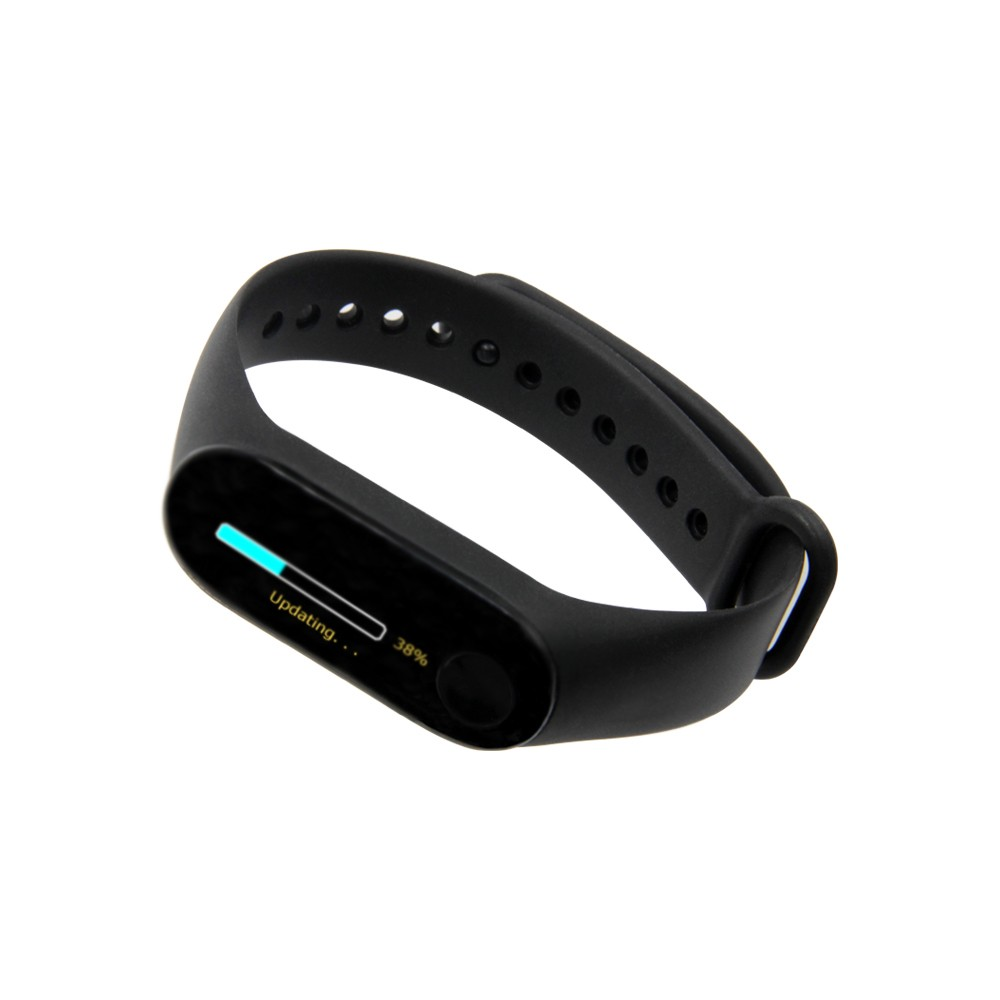
LilyGo, a Chinese company, offers some really cool ESP32-based hardware like a programmable watch, a tiny serial terminal, or an E-ink WiFi screen.
Yes you can now wait for OTA updates on your watch too!
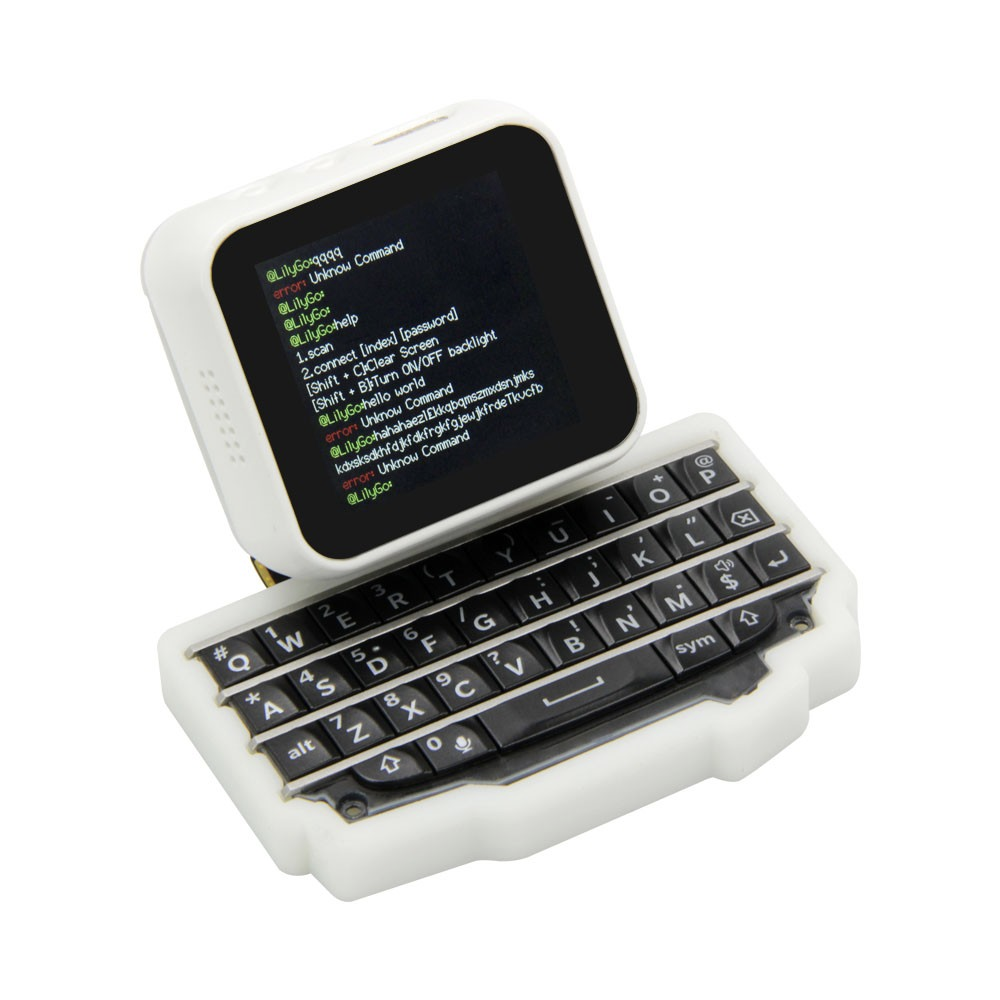
Cute VT-100 clone that fits the palm of your hand.
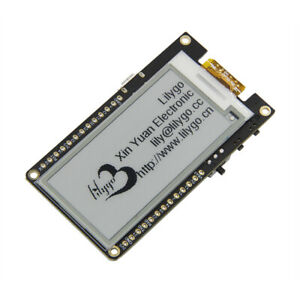
E-ink is good for long-term display without using any battery.
For really amazing stuff you can follow Bitluni on YouTube. That guy uses the analog signals to generate pictures on an oscilloscope in XY mode, or to directly generate a perfectly valid VGA signal and sound.
You can find instructions for VGA mode on https://www.instructables.com/ESP32-Basic-PC-With-VGA-Output/
If you don’t want to solder it yourself, you can find ready-to-use VGA+PS2 adapters from LilyGo.
Old 8-bit games run fine too if you have a screen and a gaming controls:
Worth noting
The next generation of ESP32 is the ESP32-C3, this time based on a RISC-V design. Espressif is promising more hardware oomph and an SDK based on RISC-V. The move to RISC-V means more reliance on standard toolchains to ease the pain of maintaining their own SDK. Don’t hold your breath though: the chip has just been announced in December 2020 and boards have not started to appear on the market yet.
Given the current price of ESP32 boards you have nothing to lose anyway by trying them yourself and get a taste of the various development environments.